Double SNOW WHITE Tutorial, Part 2

I decided to amp up my Snow White tutorial. Like in part one of my Snow White tutorial, since I’m a witch, I countered the evil queen/old with poison apple spell and I survived. Because of that, I added a few more steps to part one of my Snow White tutorial. I didn’t redo my entire face, I just added a few more fun steps and did a quick video at the end. Enjoy!

Facetune_22-12-2019-06-29-59

For my eyes, I used my brand new Jolie Beauty Lash Lock glue, which I love, and applied “Carol Anne” from Trixie Cosmetics to the upper and lower inner corner of my eyes over my “Tako” shadow. After that, I used the glue again to apply “Slime Time” from Trixie Cosmetics on the upper eye lids right above my eyeliner all the way to the end. I did the same thing with “Slime Time” under the eye as well. Once I fanned the glitter dry, I re applied a thicker layer of my cake liner and then applied my mascara to my bottom lashes.

   I wanted to amp up my Snow White look but not so much where I don’t look like her anymore.

Since I didn’t have any highlighter on obviously because Snow White didn’t wear highlighter, I decided to use my sparkly beautiful “Candy Apply Drip” Supreme Frost highlighter from Jeffree Star Cosmetics. I mean could it have been a more perfect name and color for this look?

Facetune_22-12-2019-06-31-00

I wanted to pump up my ruby red lips up a bit so I applied the luscious E.L.F Cosmetics, Jelly Pop, juicy gloss in, “Cherry Pop” to just the center of my lips.

Facetune_22-12-2019-06-41-28

Facetune_22-12-2019-06-31-44

I’m very pleased how this second part of my Snow White makeup tutorial look turned out. It was really fun and I had been wanting to do this look for awhile. I hope you all enjoy this and try either of these looks out for yourself.

XOXO, Carlie

OH AND HAPPY HOLIDAYS EVERYONE!
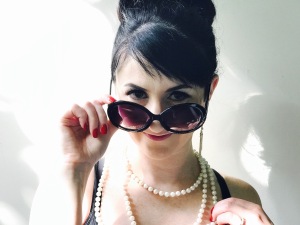
 

Double SNOW WHITE Tutorial, Part 1

IMG_1651

Good morning everyone. I’ve said this many times but for those who didn’t know, my nickname is “Snow White,” and has been since I was little due to my really dark hair, brown eyes, and fair skin. My family members and friends still call me that. Because of this and that I’ve always loved Snow White and have embraced having her as my nickname I decided to do a Snow White tutorial. Her look is very on point to my beauty style, hence why I get called her, and wanted to show step by step instructions to create a fairy tale Snow White makeup look. 

   Now this makeup look is very beautiful and very simple so I decided to do a two part makeup Snow White tutorial; THE FIRST STEP BY STEP TUTORIAL HERE IS MY SNOW WHITE TUTORIAL BEFORE SHE EATS THE POISON APPLE BY THE EVIL QUEEN/WITCH.

   THE SECOND TUTORIAL COMING UP AFTER THIS, IS MY PERSONAL SNOW WHITE TUTORIAL AFTER SHE EATS AND SURVIVES THE APPLE! OF COURSE SHE SURVIVES THE POISON, SHE GETS POISONED BY A WITCH AND SHE IS SNOW WHITE, WHICH IS MY NICKNAME AND I’M A WITCH! BOOM!!!! 

Facetune_22-12-2019-06-20-42

Here is my first innocent Snow White step by step tutorial. It’s a a very simple tutorial that anyone can wear on a daily basis. It’s a very beautiful vintage Disney look that anyone of any skin tone can pull off. I’ll tell you exact what I did to create this look plus the products I used:

For my first step, I applied my foundation with a beauty blender and I used Marc Jacobs Re(Marc)able full coverage foundation. It’s great full coverage so I didn’t need concealer.

   The second thing I did after applying my foundation was to set it with powder. I decided to use my gorgeous LaMer setting powder. That setting powder is definitely a luxury powder and has very fine mica sparkles in it to give your face a soft beautiful finish. Under my eyes, I used the Laura Mercier  Secret Brightening Powder to  help make my eyes sparkle even more.

The third step was doing my eye makeup. This is very easy to recreate. Snow White didn’t really wear eye shadow or eyeliner, especially my signature pinup winged liner. She was a natural beauty. I still wanted to give her a light eye definition so this was I used:

For eyeshadow, I first used my “Tako” white shadow from Sugar pill just in the inner corners. Then I used my classic favorite nude eyeshadow Revlon color stay quad and took the lightest color and swept it all over my eyelid. I wanted to give my crease a light definition so from the same Revlon quad palette, “Addictive 500,” I took the second to lightest shade with the same brush I used before and swept it the crease.

                     For eyeliner, I used my Laura Mercier cake eyeliner to give a little definition. Again I wasn’t planning on doing a big wing so I used the cake liner just to simply line my eyes making them look bigger. I curled my lashes and applied my Clinique High Impact mascara just on my top lashes. Again the purpose of this makeup look is basically to make the eyes look bigger like Snow White.

                    For my brows I kept them natural and just used the dark brown brow gel from Brow Bar by Reema just to keep the hairs in place.

After that I applied a soft pink blush to just the apples of my cheeks to give a natural flushed look. For my blush, I used my MAC Peony Pink blush.

For my last step for this look, all I had left was lipstick. Snow White had beautiful red lips so finding a good red lip color was very easy for me. I used the 24/7 Urban Decay lip liner in 714 and my Jeffree Star Velour liquid lip in “Cherry Wet.”  I then set my makeup with my new cherry matte setting spray from Pacifica beauty.

Facetune_22-12-2019-06-19-57

Those are all my steps to create my “Snow White” makeup tutorial, (before she eats the poison apple.) Stay tuned for part 2 of this tutorial to see what I look like after surviving the poison.

   The Poison Apple and Snow White necklace are from my girl  Luna Moon Gothic and my flower apple hair clip is from Pinups and Pearls.


Spooky Halloween Preparation OOTD

   I don’t do these often but when I do, I like to show everything and do them in a fun way so sometimes you’ll see ootd photos or videos like today. I wanted to do this video to show my spooky sexy outfit for getting my first batch of 2019 Halloween decorations at Michael’s, my home away from home. Here’s my video of my Outfit of the Day.

Breakfast at Tiffany’s Unboxing

IMG_8108

    Yesterday I had a beautiful day. One of the reasons why is that I had an amazing time at Tiffany and Co. I got some of my jewelry cleaned and got some new and stunning surprises and ended up doing an unboxing video when I got home.

Not only did I talk about what I unboxed, I talked about my love for the movie, “Breakfast Tiffany’s,” which is my favorite and Audrey Hepburn who is my favorite actress of all time. Hence why I did my “Breakfast at Tiffany’s” shoot last year, which is one of the funnest shoots I’ve ever done. Hope you enjoy this video!


Maleficent Makeup with Rhonda

E97AD45C-1D65-4FEF-8A52-03BA1B8A0C19   I couldn’t resist the urge to post yet another picture of my heavy metal sister Rhonda Burnett. As a new ritual, I should put a new makeup picture of  her every week. Hehehe. The reason for posting about her again, not that I need one,  is because of her incredible makeup look that turned herself into Maleficent. She looks absolutely stunning and if we lived closer I know we’d be doing our makeup together almost daily. 
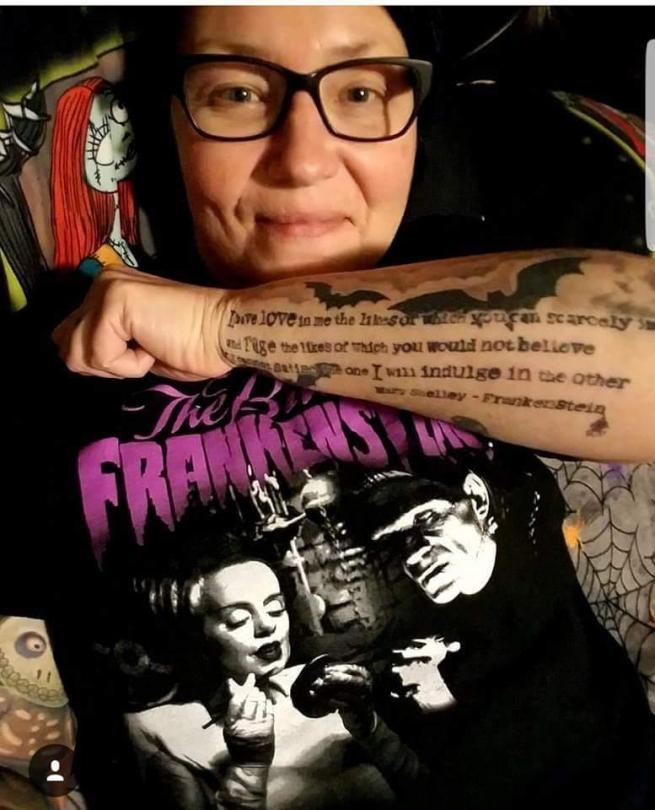
  Enjoy another one of Rhonda’s wonderful makeup looks. I’m thinking of attempting this makeup job in the future. We shall see. 


Heavy Metal Spooky Sexy Sister Rhonda Burnett

thumbnail (8)

FB_IMG_1536689713633

thumbnail (14)

   I’ve been wanting to feature the beautiful and amazing Rhonda Burnett for awhile and today is finally the day. I’ve known Rhonda for over three years and I refer to as my “Big Sister,” because she is just that. She is very nurturing, giving, and one of the kindest and strongest women I know. She also loves Halloween, the horror genre, and all things spooky as much as I do which is never a bad thing.

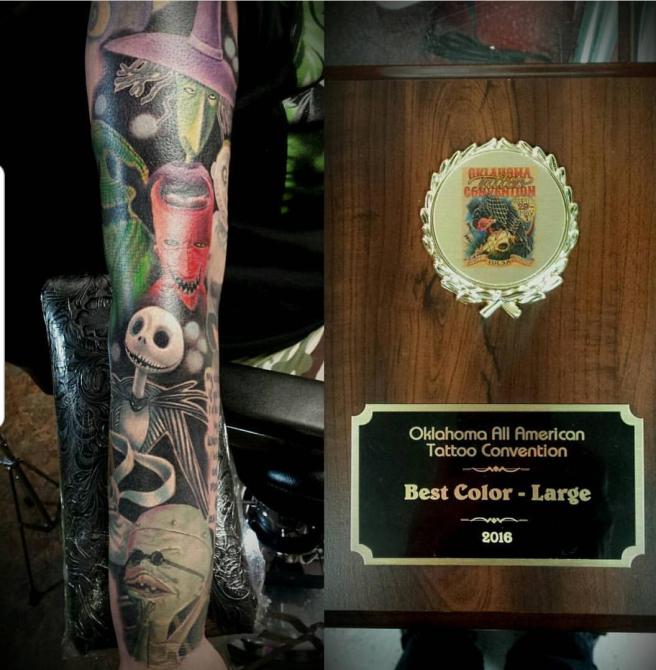
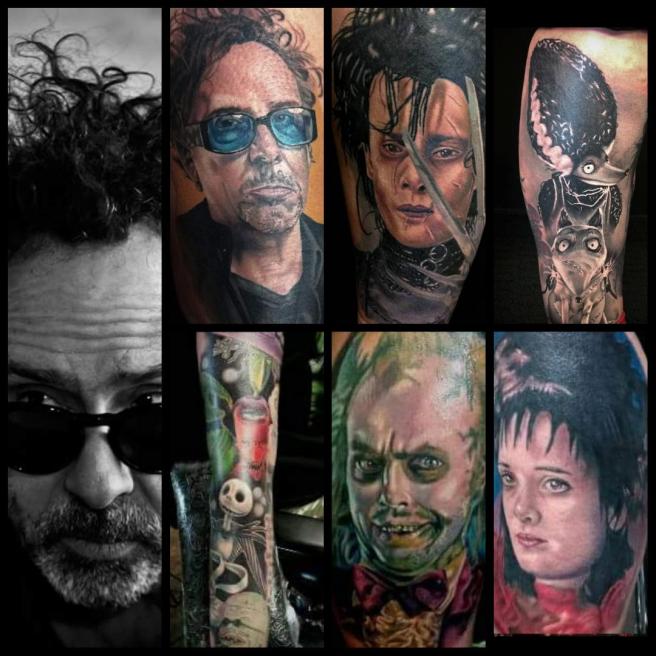
   Besides all the sweet qualities Rhonda has, she has the most amazing and sickest tattoos I’ve ever seen. She loves horror, especially Tim Burton and a lot of her ink are Burton characters which I absolutely am in love with. You can’t go wrong with Tim Burton in my opinion.

   She had a lot of ink done when I first met her and has gotten a lot more done since I’ve known her and I must say that all of her tattoos are well thought out as to where she wants them and what exactly she wants done. I love her attention to detail. Rhonda’s ink is so amazing that she has won awards for it and has been published in magazines which you can see below. Even her references are very specific to her style and don’t look like anyone else’s. Check out these photos and clips of her spectacular tattoos!

thumbnail (15)

thumbnail (16)

thumbnail (10)

thumbnail

thumbnail (17)

41688042_697691080608863_6783838085969870848_n

41527475_369601486913598_7419961637731303424_n

thumbnail (19)

thumbnail (20)

thumbnail (9)


   Here is a little background how the gorgeous Rhonda fell in love with the horror genre and specifically Tim Burton films. 

 “When I was 5 my uncle Tom got me into classic horror films… My first one was Frankenstein. I called him Frankie because I couldn’t say Frankenstein… And it took off from there. I’ve been into horror every sense. I rented the movie The nightmare before Christmas for my sons and I to watch and fell in love with it.. From that point on I got into Tim Burton films.  I got my first sleeve of the nightmare before Christmas movie on my right arm which took about 5 months to complete. Then I went on to get more tattoos of some of my favorite Tim burton movies, like Beetlejuice and Lydia, Edward Scissorhands and Frankenweenie I eventually got a recent portrait of Tim Burton on my leg… I thought to myself I love his movies and him so much I thought I need a tattoo of him on me. So I that was the last tattoo I got. 3 of my tattoos have won numerous awards. I’ll send pictures when I get them all gathered.

I really like to dress up during the month of October into some of my favorite characters. My Edward Scissorhands tattoo was featured in Inc skin magazine as well as my Nightmare Before Christmas sleeve.”   -Rhonda

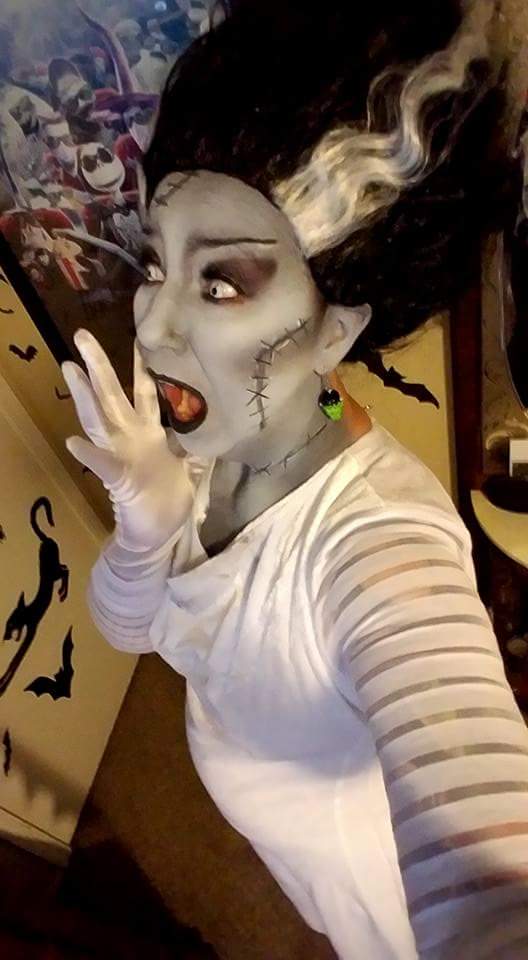
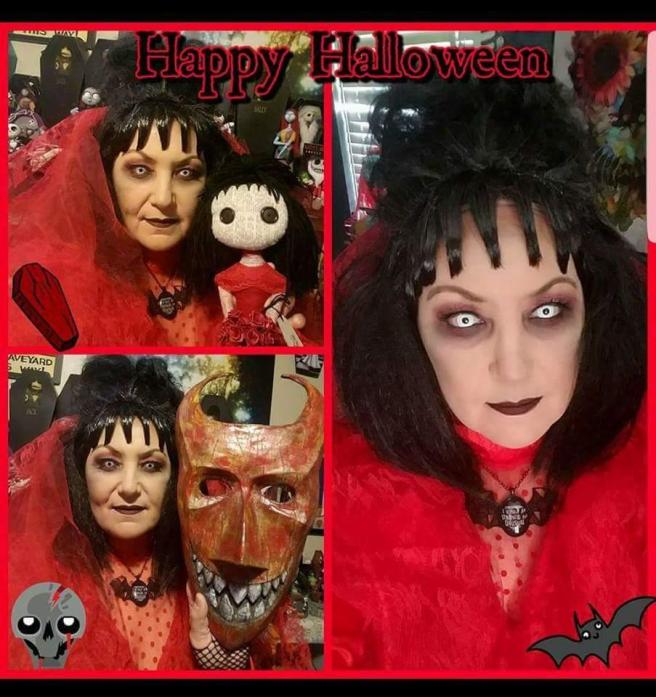
   Besides all the sisterly qualities she has that I mentioned above, Rhonda is also extremely artistic and can do her makeup to completely change her look and can make herself look like she stepped out of the movies which I absolutely love. I can’t get over her makeup skills and talent and if her and I lived closer together, we’d be doing our makeup together every day. Below are just some of the many looks she has created. It’s just a tiny taste. If I could I would post a lot more of her photos than I already have. I love showcasing other people’s talent and art, especially when it’s someone that I really love.

thumbnail (1)

FB_IMG_1536689757047

FB_IMG_1536689735895 2

FB_IMG_1536689802403

thumbnail 2

FB_IMG_1536689687539

FB_IMG_1536689655572 2

thumbnail (2)

thumbnail (3)

thumbnail (4)

thumbnail (5)

thumbnail (6)


thumbnail (7) 2

   I really admire Rhonda. She has such a kind and beautiful soul and is all about working hard and family which she loves more than anything else which is so beautiful. She also supports her friends and the work that they do, including myself and my art which I greatly appreciate. I also appreciate how much she loves Halloween, the horror genre, and all things spooky which is never a bad thing.

To see more of Rhonda, check her out at www.facebook.com/rhondaburnett05 and http://www.instagram.com/spookshowbaby_13/.

76 Days Till Halloween

IMG_7087

Even though we are in the month of August and I’m in the middle of doing different summer posts such as my “10 Looks for Summer,” which by the way I have three more summer outfit inspirations to show, I thought I would take a moment to talk about my favorite holiday, HALLOWEEN or SAMHAIN (The Witches New Year.) I’m already taking orders and working on commissions specifically with extra spooky themes such as my gargoyle candy jars that I posted and talked about on my new art site, http://carliemichellesoratartworld.com/blog/ (which you should definitely check out and follow if you haven’t already.)

 I’m so excited for the countdown to Halloween and I already want to take out my decorations to put out. Not that my house doesn’t have a bunch of spooky cool stuff out ALL YEAR ROUND like my authentic autographed Freddy Krueger glove that was used as one of the gloves in the films, my Freddy Krueger face mold, my skull collection, my horror movie posters, etc., but you can never have enough. I’ve already gotten some new decor for my house and I plan on starting my Halloween shopping this weekend since a lot of the stores like Michael’s, Cost Plus, and Pier 1. It’s never too early to start shopping for Halloween. I figure if people can start buying stuff for Christmas in June, I can start buying stuff for Halloween.

This slideshow requires JavaScript.

Mixing Pinup and Halloween is always a good thing and here’s some models rocking some “Spooky Pinup” style Halloween makeup to get you into the mood.


I ALSO INCLUDED A FEW LINKS TO SOME OF MY PREVIOUS HALLOWEEN ARTICLES I POSTED HERE IN CASE YOU HADN’T SEEN OR READ THEM. MAKE SURE TO PLEASE CHECK THEM OUT AND LEAVE YOUR COMMENTS THERE.

http://bombshell2016.blog/2017/10/01/happy-october/

http://bombshell2016.blog/2016/11/02/freddy-vs-jason/

http://bombshell2016.blog/2016/10/23/its-just-a-bunch-of-hocus-pocus/

   With all the craziness that’s been going on, I feel more connected to Halloween than usual and wanted to get people early into the Halloween spirit. To continue with that, I decided to do a post after this on my sexy Heavy Metal Horror sister, Angela. For those of you who don’t remember, a few years ago I did a feature on her ( http://bombshell2016.blog/2016/01/05/heavy-metal-witch-angela/ ). If you didn’t see it, go check it out now. I’ve known her for a little over four years now (Wow time goes by fast) and I consider her to be like a sister. She is very special to me and has many talents. One of these talents include doing INCREDIBLE  makeup looks, most of which are horror based. I wanted to show off some of her talent as well as some of her fantastic horror tattoos, so stay tuned to the post after this.

Here are my questions of the day. First do you like Halloween? What are some of your favorite things to do for Halloween? What are your favorite Halloween traditions? I’m curious to hear what everyone says. Let me know and enjoy the countdown to the best holiday of the year.

MISFIT MOMBIE BOOTIQUE

16831138_1863834850518032_921103369817763579_n
   I met Denise Sierra about two months ago through a group called, “Glamour Ghoul Gang,” which is a group that my friend Sandy Ramirez of Pretty Ghouls invited me to, and I’m glad she did. I normally don’t care about group pages on facebook but Glamour Ghoul is a fun group with very nice people and is all about horror-inspired things such as fashion, beauty, art, and more.
   Denise has an online shop called ‘Misfit Mombie Bootique,” which is such a cute name and makes incredible pieces including coffin shaped hand mirrors with liquid. When I saw these mirrors, I instantly wanted one. They looked so cool and  unique. When I first messaged Denise about placing an order, she was very sweet and asked me questions on what I wanted in the mirror such as the imagery and colors. I think it was very nice for her to customize it for me because that’s not always the case when shopping and buying online. Of course for my main color I chose red, my favorite. For the image I wanted in my mirror I chose Sherri Moon Zombie but chose a picture of her that you don’t see a lot compared to her other movie character pictures.
   This mirror is fabulous and I love how Denise made it. The quality is wonderful and she puts effort into every single detail. The movable liquid has different charms, sparkles, and glitter in it which gives it a really cool look. The prices for this Bootique are very reasonable as well which I always love. I really appreciate that even with a custom order, you get your order delivered to you pretty fast.               
   Here is my stunning Sherri Moon Zombie coffin hand mirror.
26904691_2051302391761161_4872510642772657838_n
IMG_5124
IMG_5132
IMG_5131
   Here are also a few other pieces from Misfit Mombie below. Besides hand mirrors, Misfit Mombie Boutique also makes and sells, pins, boxes, jewelry, and a lot more. She also does other themes such as music and movies. 
IMG_5128
   After I asked Denise if I could do a review on my site here, I also asked for a little bio about herself and her shop which I enjoyed learning. I’m always fascinated how people begin something and what inspires them. Here is how Denise and Misfit Mombie Bootique got started. Enjoy.
  “Hi! My name is Denise. I own Misfit Mombie Bootique. I was born and raised in Texas. I am a mother to four boys and two grand boys that I call my gremlins. I am a huge horror fan. Since I was a young girl I’ve always loved watching horror movies. My favorite holiday is Halloween! I just love the fall and everything about it. Most of my items are Halloween and/or horror inspired. 
    I started experimenting with resin in 2013. It started when I was looking for arts and crafts to do with my youngest son. I somehow came across resin crafting. I instantly got hooked. (Even though my very first pour was a fail. Lol!) I would go out and folks would approach me and ask me where I got my jewelry from and it inspired me to start selling my items. 
    For me, the best part is having all these wonderful ghouls love my work and wear it or display it proudly. I love being able to customize my pieces for my customers so they have something that reflects their personality. My only hope is that I can continue to perfect my craft and continue to grow my business.”
   I definitely recommend checking out, ” Misfit Mombie.” I’m very glad I found her “Bootique,” and that I met her.  Check it out, place a custom order, and enjoy!

Psychobilly Look One

I’ve never done a psychobilly makeup tutorial or posted a lot of my psychobilly looks on here so I decided to change that. For those who don’t know what psychobilly is, here are some definitions.

Psychobilly is a rock music fusion genre that mixes elements of Rockabilly and Punk Rock. 

TheFreeDictionary.com defines it as “loud frantic rockabilly music.”

   About.com  says that it takes the traditional countrified  rock style know as rockabilly ramping up its speed to a sweaty pace, and combining it with punk rock, sci-fi, and horror film imagery.  SO DUH, OF COURSE I LOVE IT!

As far as my definition goes as psychobilly makeup, I believe it’s taking the traditional rockabilly makeup and amping it up with  bright colors, different color lipstick rather than classic red, different color combinations, more eyeliner, longer lashes, etc.

IMG_4517

IMG_4518

Here is a blue and green psychobilly look and tutorial which is a color combo that I don’t use a lot in makeup. This look was a new one for me and was fun to do and play around with. MAKEUP SHOULD ALWAYS BE FUN! THAT’S THE MOST IMPORTANT THING! IF MAKEUP ISN’T FUN, THAN REALLY WHAT’S THE POINT?

Enjoy and listed below are the colors and products I used:

EyeShadows:

First I used “Safe Word,” as a transition shade from the Jeffree Star Cosmetics palette, “Androgyny.” 

Second I used the green color “EXU,” from the Urban Decay Jean-Michel Basquiat palette. I spray MAC cosmetics Prep and Prime Fix on my brush before dipping it into the green.

Third color I used was also from the “Androgyny” palette in the dark blue shade, “Swallow,” just about my crease.

My crease color is from the Jeffree Star Cosmetics palette, “Beauty Killer” in the sparkly blue shade, “Expensive.” I sprayed my angled shadow brush again with the prep and prime to make the blue glitter pop and put it in my crease and slowly dragged it down to the outer corner of my lid.

The last color I used in my inner corners is “Rich Bitch” from “Beauty Killer.” I sprayed my detailed brush and pressed the glittery gold in the inner corners of my eyes to make them pop. 

I really love this color combination.

I did my eyeliner wings as normal but made them longer and more extreme. Underneath my eyes I took a small brush and lined my eyes in the two blue colors I used on top, darker at the outer corner, brighter blue towards the inner. I applied mascara to both top and bottom lashes and lined my waterline with Urban Decay 24/7 waterline in black.

For my highlight, I used my David Bowie highlighter from Bitch Slap Cosmetics and used blush from Stila in both “Romantic” and “Playful.”

Last for my lipstick, I used “Venus Fly Trap” from the Jeffree Star Cosmetics Chrome Collection. I normally wear my classic red lipstick with this look but I thought the green color was a fun alternative. 

My look was then complete and I’m very happy with how it turned out.